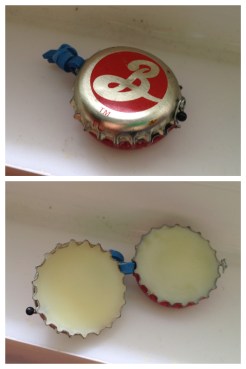
So. You’ve been making all this fancy DIY beauty stuff. You’ve got your own tiny apothecary filled with chapstick and wax and face oil and dry shampoo, but where are you storing it all? True, it’s what’s on the inside that matters, but everyone appreciates a pretty little something, right?
Since Laneia and I are going to be making chapstick with our campers, we’ve got a how-to so you can play along at home. Before you mix up your lip balm, why not have a few beers and make a container for it? It’s a little bit time consuming and you just might super glue your fingers together, but the finished product is worth all the work.

Bottle Cap Clamshell
Ingredients
2 Bottle Caps
Wire
A straight pin
A rubber band
Superglue
A hammer
A nail
A piece of scrap wood
Wire cutters
Instructions
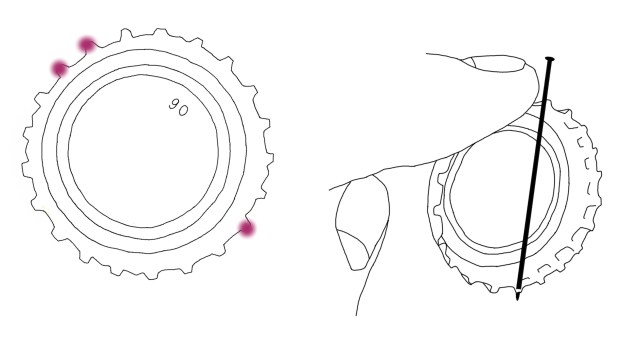
1. Use a hammer and nail to punch 2 holes right next to each other along the ridges of two bottle caps. Use the scrap wood as a surface so you don’t destroy your table.
2. On the opposite sides of each bottle cap, punch one more hole.
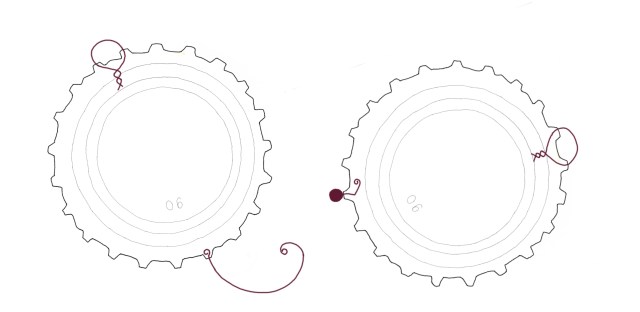
3. String wire through the two holes next to each other to make a little loop on the outside and twist it together on the inside to secure it. Do this on both bottle caps.
4. String wire through the single hole on one of the bottle caps to make a clasp. I twist the part on the outside into a hook and secure the inside by twisting the wire into a loop.
5. Cut the straight pin in half and bend it into an L shape. Poke it through the single hole on the other bottle cap and then twist the inside into a loop to secure it. This is what the hook with latch onto.
6. Superglue everything into place. This is important because it’ll keep chapstick (or whatever you store in it) from leaking out the tiny holes and it’ll keep the hinge and hook from moving the contents around every time you open and close the clamshell. Let everything dry overnight juuuust in case.
7. Cut a rubber band in half and string it through the little loops on each bottle cap and tie a knot.
8. Fill that baby up.


Comments
That’s really cool! Although with me, beer + superglue is always an adventure.
Oh yeah, and hammers. Now we’re probably talking survival horror.
Wow that’s really nice! :D
this is SO impressive. i remember seeing one of these at camp in april (laura, did you make some at camp in april?) and being so intrigued. now i can (possibly, potentially, maybe) make one of my very own!
Can I just say Laura that you are a superstar and I love these DIY posts.
so…where exactly does the superglue go? Congratulate me for asking because I normally wouldn’t then I’d improv what to do and end up with a goddam mess.
you squeeze the superglue onto the holes and the wires going through them. you can do it!
THESE ARE SO CUTE. i have one that laura made and it’s the best most tiniest thing, much like laura herself.
Tiny things are the cutest!
ooh cool! I’m going to make a million of these.