Hi! It’s me, Laneia, how’s your International Mix Tape Week going? Your future is bright and everything, right? You’ve downloaded the FUTURE IS BRIGHT mix and you want to make it pretty in the grand tradition of superfly mix tapes of the olden days? But all you’ve got is one of those new-fangled CDs? Well, never fear. Your Guide to making a hot CD sleeve is here.
These handmade CD sleeves are reminiscent of classic album covers and are flippin’ easy to make, for real. However, I’ve never done a tutorial before, so there’s a 40% chance that these instructions will make no sense. Post any questions you may have in the comments or email me at [email protected]. Now download your PDF template and get started!
Version 1 – The simple version
Version 2 [part 1 + part 2] – This version has a front cover
Important Note! When printing your templates, DO NOT scale the image to fit the page!
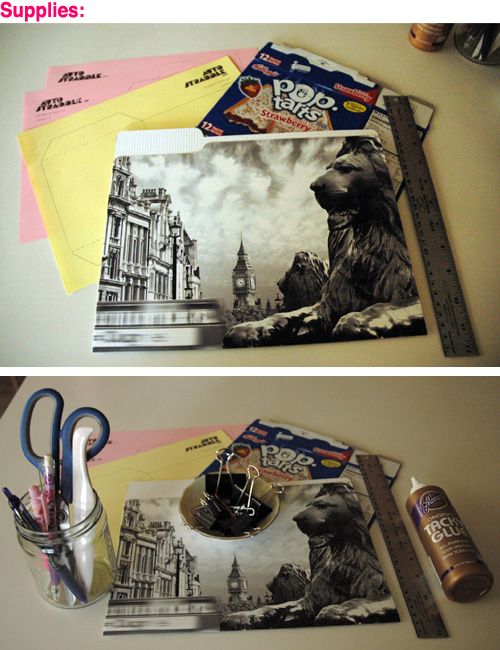
+ used file folder or an empty cereal/cracker/pop-tart box
+ tacky glue
+ ruler
+ scissors
+ bone folder
+ binder clips/paper clips
+ pen/pencil
+ fancy template
+ magazine clippings, stickers, sequins, photo corners, ribbon, fun fur, jazz hands, your imagination, etc. for personalizing
Version 1 is so simple, I think the template speaks for itself. The following instructions are primarily for Version 2, which is only slightly more complicated.
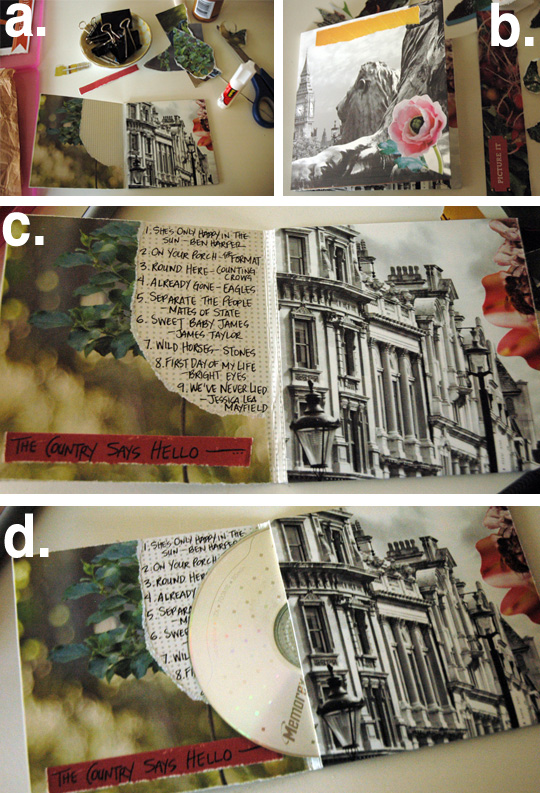
Step 1: After you’ve cut out the template, place it on your folder or empty box, trace the outline and cut.
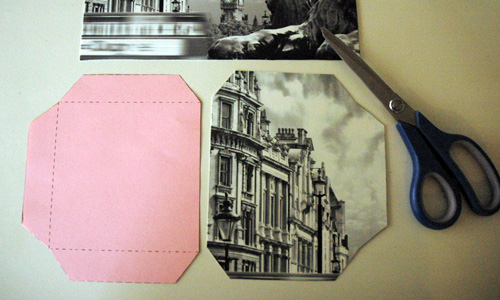
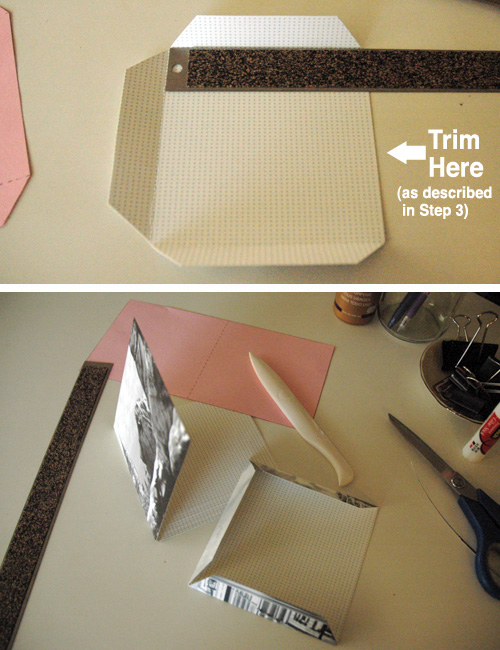
Step 2: Fold the tabs over the side of a ruler to create straight edges. Fold the large rectangular piece in half using the same method. Crease all folds with a bone folder (or comparable tool).
Step 3: Align each piece and double-check that they all fit together nicely. If you’re making Version 2, you’ll probably need to cut a tiny strip from the untabbed side of the tabbed square to ensure the front cover can fold over properly after glued.
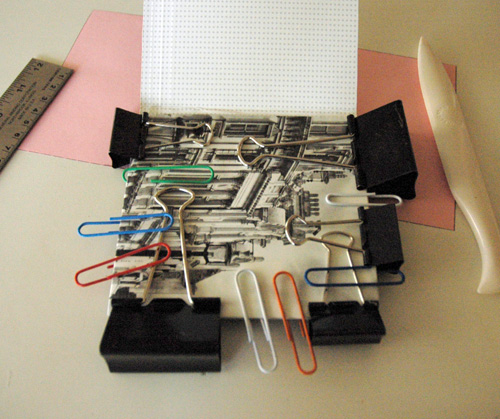
Step 4: Apply several tiny drops of glue to the outside of the tabs, place on top of the right side of the rectangular piece (if using Version 1, simply fold over), then secure with binder clips and paper clips all the way around. Allow the glue to dry for a few minutes.
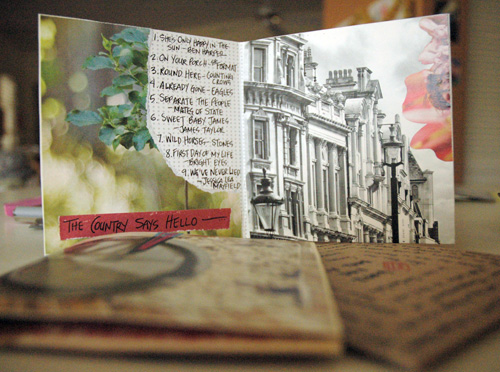
Step 5: Decorate and personalize! This is the best part, obviously. The theme for this mix was “The Country Says Hello” — a love letter to a country girl living in the big city. I found some magazine clippings of greenery and flowers to glue over the black and white cityscape that was already printed on the file folder and wrote the playlist on the inside of the front flap. Hand-writing the playlist is a nice touch.
Ta-da!
Here are a couple of other examples of cd sleeves I’ve made!
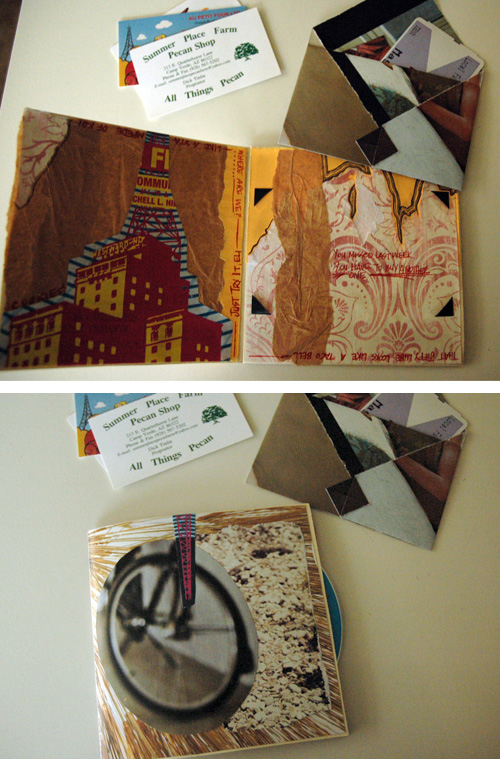
The Saturday Morning mix sleeve was made using a plain file folder, so I had plenty of blank space to fill in. It reflects the theme in a number of ways and was hella fun to make. Our Saturday mornings are usually spent at the Downtown Public Market, so the recycled magazine envelope, which is attached using self-adhesive photo corners, holds several business cards from local farms and bakeries, as well as an expired Valley Metro pass. The Westward Hotel is a major landmark of downtown Phoenix, so I had to include a picture of it inside the front flap. Utilizing a small envelope on the inside of your cd sleeve is a great way to preserve small items from road trips or other special occasion. This project ended up being more of a scrapbook than a simple cd holder, which is super nostalgic of me, la la la laaaa!
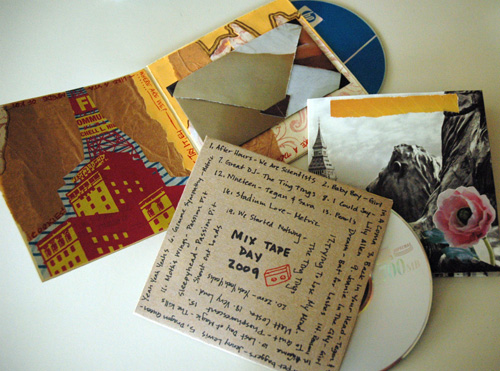
The Mix Tape Day ’09 sleeve was made using an empty cereal box. The outside art is on the inside of the sleeve! Cheryl wrote the playlist on the front cover and drew a simple picture of a cassette tape. Voilà! Easy peasy.
The template we’ve provided here can be tweaked in a few places to make it even more unique. Try cutting the tabbed square in Version 2 into a tabbed triangle instead, or a half square with a scalloped opening edge would be cute, too. Attach two small pieces of ribbon to tie it closed, or Velcro! Who among us doesn’t love Velcro? Use your imagination and have fun! [I sound like a Kindergarten teacher! Don’t eat that paste!]



yay! i love arts and crafts!! these look great!
Absolutely love these. Great job, Laneia.
it’s projects like this that remind me why i have 8 cereal boxes filled with pretty pages i’ve torn out from magazines. thanks!!
Ahhh your covers are so pretty! I can’t wait to try this!
Oh, this is awesome! Those look great.
I’ll have to make some sleeves later. (:
When I make Mix tapes, er cds, I usually put them in old jewel cases and make my own ‘art’ by cutting things out of magazines and trimming them so they fit in the slot in the case. This seems like so much more fun! :D
can’t wait to make some!
I’m loving International Mix Tape Week
guess what i’m doing when i get home from work!
That’s such a great idea. Yours turned out so beautiful. I will definitely do that when I have the time.
Crafternoon!
Cool, thanks for the template, so much better than using a plastic jewel case! I made one and sent it to a cute girl! :)
hallooo! i’m so glad you guys like these! i’d love to see the cd sleeves you make — email pictures to green[at]autostraddle[dot]com, so i can brag about how talented/awesome our readers are!
Yes!
I’ve been looking for some creative way to keep my mix-cds in! Forget those boring plastic cases.
Thank you Laneia! :3
Oh Laneia, Thank you so much for this. I’ve been dragging my feet around everyday not knowing what little projects I want to do. But now you’ve given me these templates and the ideas are pouring out of me. This could spice up my portfolio! It can put me on the map! (not really..but I’m a dreamer). All these samples you’ve shown are beautiful and so well thought out. I will be posting pics everywhere, for sure! :)
Thank you!
Awesome, any chance you could post these as JPEG’s or a PSD so we could use your template in photoshop?
Thanks
I’m so going to make one! Thanks!
Aw man, I forgot to mention this before but I totally used this to make mixtapes for two really good friends that moved away in November. Thanks alot Laneia! They turned out super awesome! Also, I’d like to let you know that this page has permanent residency in the DIY folder of my bookmarks.
Pingback: Create Digital Music » An Ode to the CD by CD Baby; Could You Really Love Music Buyers This Much?
I got here through this post http://www.autostraddle.com/laneias-team-pick-90s-woman-alphabet/ – and i am very happy. I am traveling to UK/Europe 2 weeks from now and I knew i need this http://www.autostraddle.com/leaving-on-a-jet-plane-46804/ and maybe http://www.autostraddle.com/how-to-meet-other-queers-63456/
I hope all the links appear as they should so you can see what i did there.
Yes autostraddle team, it is becoming more apparent i got everything i need here, just right HERE, and that makes me glad.
sidenote: because no autostraddle article is ever too old or irrelevant. Like a landmine of gold you are
Pingback: CD-Hülle aus Papier oder Nadelfilz für das Mixtape » Kreativ-Reaktor
uh sorry but this is AMAZING. thanks for posting this!!
Girl, you are so fly. Thanks for the tutorial. Will be using this for my bands CD release!
Wow.. this is amazing.. brilliant, can’t wait to try this out!
Just made my draft and it looks great! Thanks so much!
i needed this today more than you could ever have imagined. Autostraddle just has my back covered for every aspect of the human experience. never in my wildest dreams would i have imagined the amazing c.d. cover i have just made. i have a new life skill. thank you. i did not know binder clips could be used in this way. heck, i didn’t even know i had any. plus it gave me a chance to crack out my hands and feet paperclip set!
this day is turning out to be so perfect and that is thanks to you, Laneia. thank you for existing.
This is a super old post but I’m glad I found it! I just made the cutest cd sleeve and mixtape for my girl’s birthday. The directions are super easy to follow!
Laneia! Hi, I’m here and these are adorable!
Thank you for the wonderful idea! Making this CD cover for a mix I made my girlfriend for our “Big” year and a half! :)
These are beautiful and really helped me out to create my cd cover design for my graphics a-level! yours are really beautiful!!
I was making version 2, and excuse me for the stupid question, but I followed the directions and where did you get the part you ripped a little for the playlist? It looks like a necessary part but I don’t see which step adds it on? Sorry if I sound stupid.
Pingback: 25 LDR Surprises (Part 2) | ldr13
Pingback: DIY Birthday Present: CD With Label and Sleeve | Casey Kay B